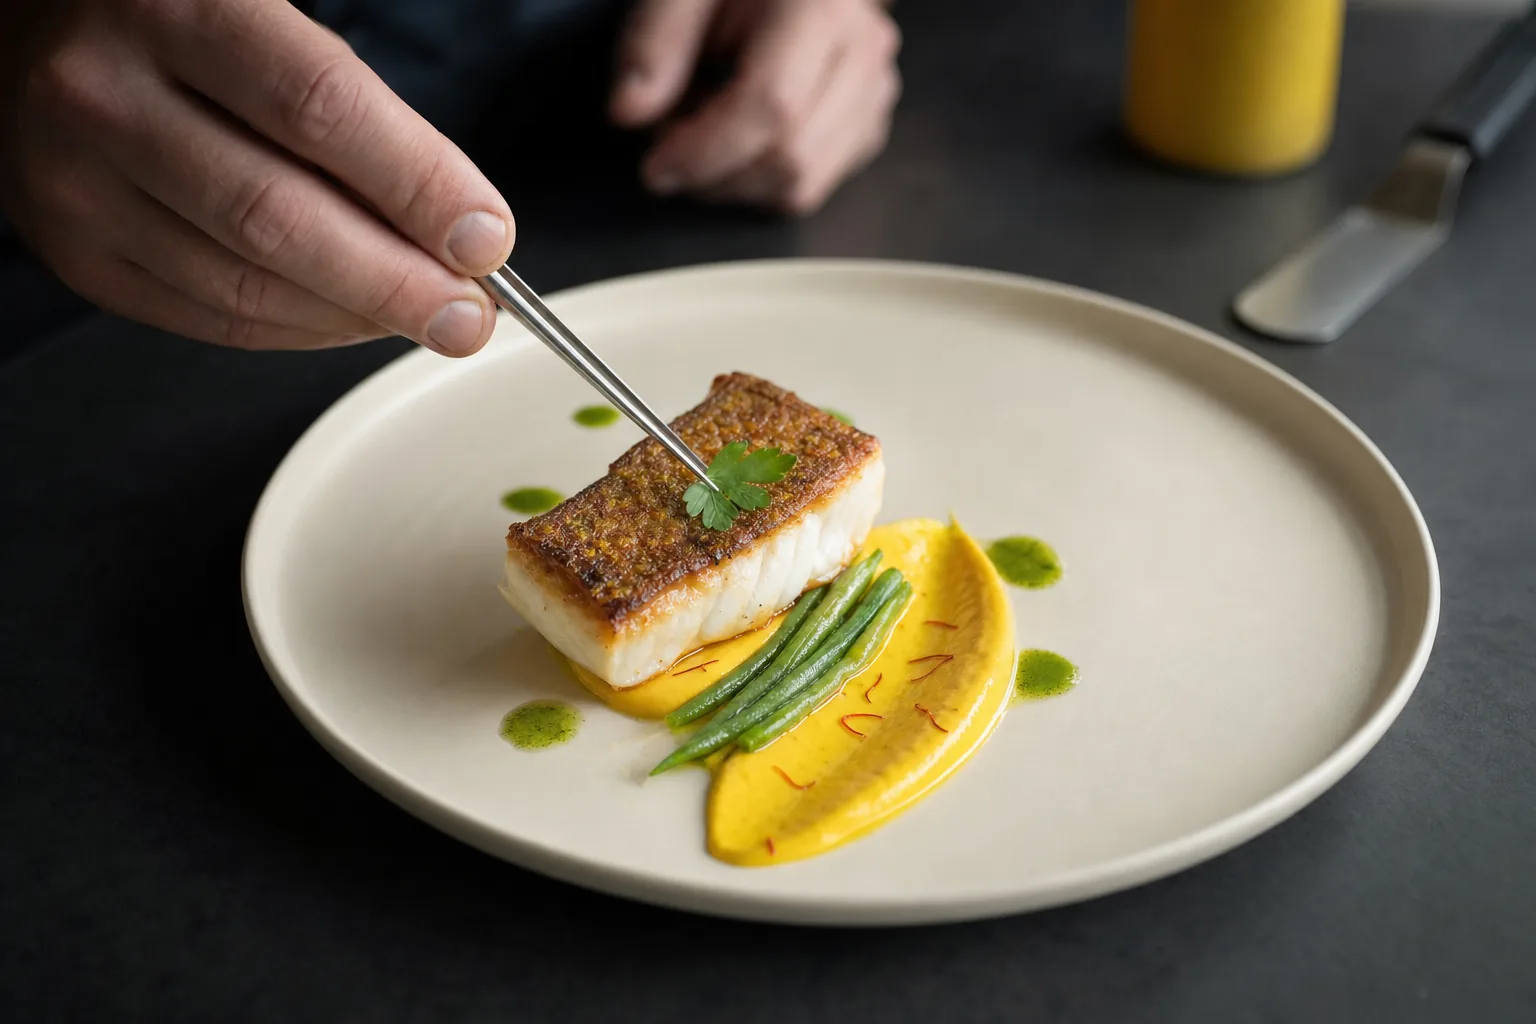
Why presentation matters
Guests eat with their eyes before they taste anything. A well-presented plate sets expectations, signals care and makes the price feel fair. A messy plate, even of delicious food, suggests the kitchen is rushed or careless. Presentation is also how guests remember and share a meal, which matters when so many diners photograph their food and look at menu photos before visiting.
Good plating is not about tweezers and microgreens on everything. It is about making the food easy to understand and pleasant to eat. A bowl of dal with a glossy tadka, a sprinkle of coriander and a wedge of lime can be as beautifully presented as a tasting-menu course. The principles are the same: a clear focal point, natural color, sensible portions, clean edges and garnishes that belong.
This guide covers the visual principles, the practical techniques for sauces and garnishes, plate choice and, most importantly for restaurants, how to make every cook on every shift plate the same dish the same way. It finishes with practical advice on photographing your plates so the images on your menu match what guests receive. The examples range from fine dining to casual cafés and Indian thali service, because the same principles hold at every price point.
Composition: give every plate a focal point
Start with the main element, usually the protein or the star vegetable, and decide where the eye should land first. Many cooks place it slightly off center or in the lower third of the plate, following the rule of thirds used in photography. The classic clock method places the protein at six o’clock, the starch at ten and the vegetables at two, a simple layout that still works well for traditional main courses.
Odd numbers usually look more natural than even ones: three scallops or five slices of duck appear balanced without seeming rigid. Create flow with lines and curves. A sauce swoosh, a row of components or a curved arrangement guides the eye across the plate. Think about how the guest will eat: the protein should be easy to cut, and components meant to be eaten together should sit together.
- Decide the focal point before you start and build around it.
- Use odd numbers for repeated items such as dumplings, shrimp or slices.
- Keep components that are eaten together physically close.
- Face the best side of the protein toward the guest, such as the seared side of a fish fillet.
- Leave a clean rim; food and sauce should not touch the outer edge.
- Plate the same layout every time so servers can describe the dish confidently.
Color and contrast
Color tells guests a dish is fresh and well cooked. A plate that is entirely beige, such as fried chicken with fries and a pale sauce, looks heavy before anyone tastes it. Contrast comes naturally from good cooking choices: blanch and shock green vegetables in ice water to keep them vivid, roast for deep caramelized color, add a bright pickle or a fresh herb salad, or use a vibrant sauce such as a beetroot purée or green chutney.
Use color that makes culinary sense. A scattering of edible flowers on a robust beef stew is confusing, while a spoon of salsa verde adds both color and acidity. Traditional Indian thalis are excellent examples of natural color balance: the yellow of dal, the green of a sabzi, the red of a pickle, white rice and golden breads each tell the guest something different. Plate background matters too; bright food pops on a white or cream plate, and pale food can look striking on dark stoneware.
Height, texture and negative space
Three structural choices separate a composed plate from food simply put on a dish. Each should be used with restraint, matched to the style of the restaurant and tested for practicality during a busy service. A casual bistro and a tasting-menu restaurant will use them differently, but both benefit from thinking about them deliberately rather than leaving them to chance.
Before committing to a design, walk a test plate from the pass to the farthest table and back. Anything that slides, wilts, collapses or pools on that short journey will do the same on a busy night. Practical plating survives the trip to the guest, and that test catches more problems than any amount of admiring the plate at the pass.
Height
Height adds drama and makes a plate look generous. Lean slices against a purée, rest a protein on a bed of grains or greens, or stack components loosely. Avoid towers that collapse when the server walks to the table or that guests must dismantle before eating. A ring mold can shape rice, tartare or salads, but loose, natural height usually looks more appetizing than rigid cylinders.
Texture
Texture is both visual and physical. A plate with only soft components looks and eats flat, so add something crisp, such as toasted seeds, fried shallots, crackling, crumbs or sev, and something fresh, such as herbs or raw shaved vegetables. Visible texture signals variety in the eating experience. Add crisp elements at the last moment so they do not soften under sauce on the way to the table.
Negative space
Empty space on the plate frames the food and makes it look intentional. A larger plate with a compact arrangement often looks more refined than a crowded smaller one. Negative space should not mean small portions, though; guests should still feel fed. Balance the frame with a portion size that matches your price and style, and avoid using an oversized plate that makes a fair portion look meager.
Sauce techniques that look and eat well
Sauce placement changes both the look and the eating of a dish. Sauce poured over crisp skin ruins the crunch, while a sauce pooled beneath the protein keeps the skin crisp and still lets the guest combine them. Consistency is critical: a sauce that is too thin bleeds across the plate, and one that is too thick sits in clumps. Check and adjust consistency throughout service, especially for reduced sauces held on the line.
Choose a technique that suits the dish and the speed of your service. Elaborate dots and swooshes look striking in photographs but take time and practice to do consistently at volume. For many restaurants, a neat pool or a generous spoonful applied the same way every time is the better choice. In Indian service, gravies are often served in a katori or bowl beside the bread or rice, letting guests control the amount.
| Technique | Best for | Tool | Watch out for |
|---|---|---|---|
| Pool under the protein | Crisp-skinned fish, chicken, pork belly | Ladle or spoon | Sauce too thin and spreading to the rim |
| Swoosh or smear | Purées and thick sauces | Spoon or offset spatula | Inconsistent shapes between cooks |
| Dots | Gels, emulsions, reductions | Squeeze bottle | Slow at volume; dots that run together |
| Spooned over | Braises, glazed vegetables, pasta | Spoon | Covering textures that should stay crisp |
| Served on the side | Gravies, dressings, dips | Small bowl, jug or katori | Extra dishwashing and space on the table |
Garnishes that make sense
The rule for garnishes is simple: if it is on the plate, it should be edible and it should belong in the dish. A sprig of curly parsley or an orange slice added out of habit tells guests the kitchen is going through the motions. A garnish should add flavor, texture, color or aroma that complements the main elements, and ideally all four.
Prepare garnishes as part of mise en place, stored properly so they stay fresh through service. Herbs keep better on a damp cloth in a covered container in the fridge; crisp elements should be stored airtight and away from humidity. Make garnish portions small and precise, and include them in the plating spec so they are not left to individual taste.
- Good: a lime wedge with fried fish, adding acidity the guest can control.
- Good: crispy fried curry leaves on a coconut fish curry, adding aroma and crunch.
- Good: toasted almonds and herbs on a pilaf, adding texture and freshness.
- Avoid: whole inedible herb branches, decorative leaves or garnishes guests must remove.
- Avoid: microgreens on every dish regardless of flavor.
- Avoid: powders, dusts and drizzles around the rim that add nothing to the taste.
Choosing the right plates
The plate is the frame. Size, shape, color and material all change how a dish is perceived. A wide-rimmed plate looks formal and gives plenty of negative space; a coupe plate without a rim is more contemporary and holds sauces well; a shallow bowl suits risotto, pasta, curries and dishes with broth. Make sure the plate holds the portion comfortably without crowding.
White and cream plates are versatile and make colors stand out. Dark stoneware gives drama to pale foods and desserts. Handmade ceramics add warmth but are often less consistent in size and can chip, so check durability and stackability before buying in volume. Traditional serveware, such as banana leaves, steel thalis, copper handis or clay pots, communicates authenticity when it suits the cuisine. Temperature matters too: warm plates for hot food so it does not cool on the way to the table, and chilled plates for cold starters and some desserts.
Keeping plating consistent across a team
The hardest part of plating in a restaurant is not creating a beautiful plate once; it is having every cook plate it identically on a Saturday night. Consistency comes from clear specifications, the right tools and checking before plates leave the pass. Without them, the same dish looks different every time and guests notice when they visit again or compare their plate with a friend’s.
Create a plating spec for every dish: a reference photograph, portion weights for each component, plate type, sauce technique and garnish quantities. Keep it at the station and in the recipe book. Rehearse new dishes before they go on the menu, with each cook plating several times while the chef corrects details. Then the head chef or sous chef checks every plate at the pass for portion, placement, clean rims and temperature.
- Photograph the approved plate from above and at a 45-degree angle and attach it to the recipe.
- List portion weights for each component and keep scales at the plating station.
- Standardize the tools: squeeze bottles, offset spatulas, tweezers, ring molds and portion spoons.
- Rehearse new dishes in a pre-service session until every cook can match the reference.
- Check every plate at the pass and wipe the rim with a clean, damp cloth before it leaves.
- Review plates during service and give quick, specific feedback rather than general criticism.
The hardest part of plating in a restaurant is not creating a beautiful plate once; it is having every cook plate it identically on a Saturday night.
Photographing plates for your menu
Menu photographs should show the dish guests will actually receive. Plate it exactly to the spec, with the same plate and portion, and photograph it immediately before sauces set or herbs wilt. Natural, indirect daylight from a side window is ideal; avoid harsh overhead fluorescent light and on-camera flash. A modern phone is enough if it is steady and the lens is clean.
Choose the angle that suits the food. Flat foods such as pizzas, thalis and salads look best from directly above; burgers, layered desserts and drinks look better at a lower angle that shows height. Keep backgrounds simple and consistent across the menu so dishes look like they belong together. Avoid heavy filters that change the color of the food. A small white card held opposite the window bounces light into the shadows, and a quick wipe of the rim before each shot keeps drips out of the frame.
Once photographed, use the images consistently. If you publish your menu with Menulo, you can add dish photos to each item so guests scanning your QR code see what will arrive. Update the photo when a dish changes so the image and the plate keep matching. For more on lighting and styling, see our guide to food photography for menus.
Frequently asked questions
What are the basic principles of food plating?
Start with a clear focal point, usually the main protein or vegetable, and arrange components around it with balance and flow. Use natural color contrast, controlled height and enough negative space to frame the food. Keep rims clean, use odd numbers for repeated items and make sure every garnish is edible and adds flavor or texture.
What is the clock method of plating?
The clock method is a traditional layout for main courses. Imagining the plate as a clock face, the protein sits at six o’clock, closest to the guest, the starch at around ten o’clock and the vegetables at around two o’clock. It creates a balanced, easy-to-eat plate and is still a useful starting point for training.
How do restaurants keep plating consistent?
They use plating specifications for each dish, including a reference photo, portion weights, plate type, sauce technique and garnish. Cooks rehearse new dishes before launch, standard tools are kept at each station and a senior chef checks every plate at the pass for portion, placement, cleanliness and temperature before it goes out.
What color plates are best for food presentation?
White and cream plates are the most versatile because they make food colors stand out and suit almost any cuisine. Dark plates can make pale foods, desserts and brightly colored dishes look dramatic. Choose a palette that suits your style and food, and keep it consistent so the menu looks coherent.
Should garnishes always be edible?
Yes. Every garnish on a plate should be safe and pleasant to eat and should add flavor, texture, color or aroma that complements the dish. Inedible decorations force guests to work around them and can create confusion or safety concerns. If an element does not improve the dish when eaten, leave it off.
- #plating
- #foodpresentation
- #garnish
- #restaurantconsistency
- #foodstyling